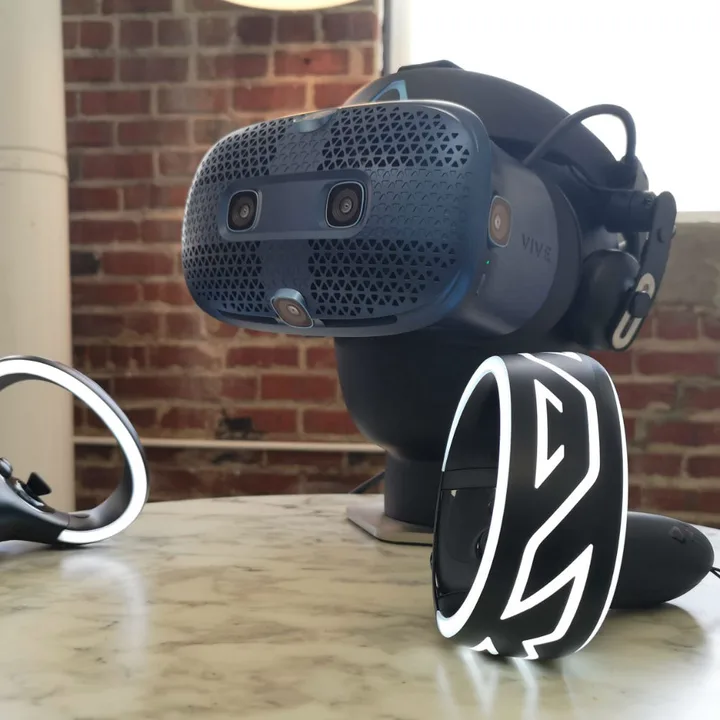
Virtual reality (VC) headsets are all the rage these days. It provides a more immersive experience in the game world and gives you the opportunity to move around if everything is working properly. HTC’s latest Vive headsets, including the impressive Cosmos and the new Vive Pro 2, are more reliable than ever, but problems can still occur.
We cover common HTC Vive issues users face, from “headset not found” errors to pairing issues. We will then suggest possible fixes and provide step-by-step instructions on how to resolve any issues you may be experiencing with your HTC Vive.
Issues displayed with error codes
(Error 108) Headset not found
This error can appear in two ways: as an error message (Error 108) or as a blinking red light on the headset. This is usually caused by USB or driver issues.
Possible Fixes:
- First of all, make sure your headset is connected properly. If in doubt, remove everything and reconnect.
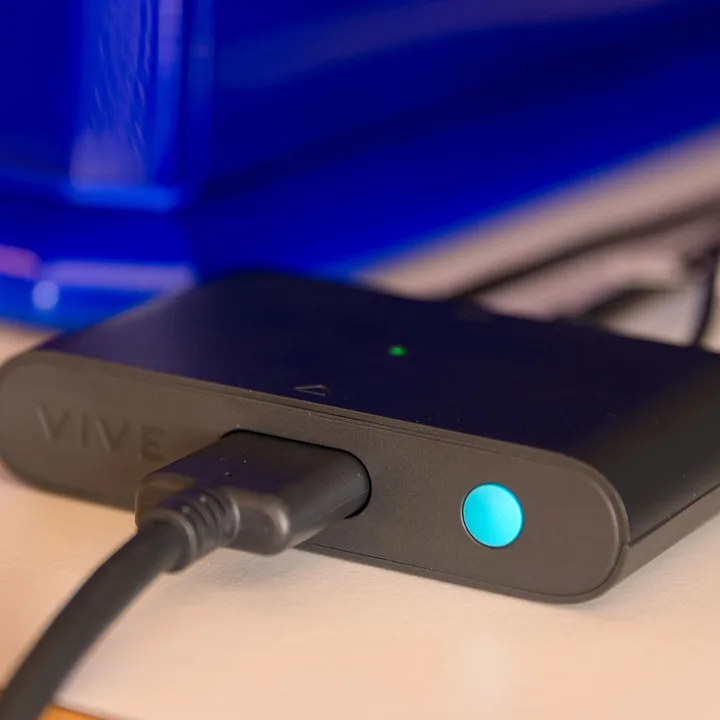
- The headset’s power, USB, and HDMI cables must be connected to the correct slots on the link box. From there, you need to connect the USB and HDMI of the link box to your PC and plug the power cord into a power outlet.
- When properly connected, the LED on the headset will turn green to indicate that it is ready to use.
- If everything is plugged in but your headset won’t turn on, try a different outlet.
If the problem still persists after doing this, there are several other methods you can try.
Reboot headset
Step 1: In SteamVR, right-click the headset icon and Reboot your Vive headset.
Step 2: Wait until the reboot is complete.
Turn the link box off and then back on.
Step 1: Quit SteamVR.
Step 2: Unplug the power and USB cord from the PC side of the link box (not the orange side of the link box).
Step 3: After a few minutes, reconnect the power and USB cord to the Link Box. If you see a notification in your taskbar that the driver is being installed, wait until it’s finished.
Step 4: Restart SteamVR. You may need to repeat this process more than once for the error to no longer appear.
Restart your computer
Step 1: Exit SteamVR and reboot your computer.
Please use a different USB port
Sometimes, you may encounter errors when connecting to USB 3.0 and 3.1 ports. In this case, try using a USB 2.0 port instead. If you already have a busy, working USB port (such as the one your keyboard or mouse is connected to), try moving your Vive connection to that port. If you still can’t connect after trying all possible USB ports, try resetting your USB device by following these steps:
Step 1: Disconnect the link cable from the PC.
Step 2: Go to next SteamVR > Settings > GeneralAnd check out the following: Developer Settings The box is checked.
Step 3: click put it back In the sidebar.
Step 4: Double-check that the link box’s USB cable is disconnected from the PC. click Remove all SteamVR devices and click yes When prompted.
Step 5: Exit SteamVR, reconnect the link box to your PC, and then restart SteamVR.
If you have tried all the fixes outlined above, your USB chipset may be causing the problem. Check the Steam support page for detailed descriptions of compatible USB chipsets.
(Error 113) Unable to write path to registry.
This is usually caused by a lack of proper installation permissions. You need to change permissions in Windows.
Change permissions
Step 1: Go to the folder whose permissions you want to change.
Step 2: Right-click and select. attribute.
Step 3: Click Next. security tag.
Step 4: Check the name listed in . username group box. If you don’t see the account you’re using add Enter the name of the user you want to add. If your username is already displayed, skip this step.
Step 5: To change permissions allow or deny Check the box. Permissions for users or groups box. You’ll want to allow access to fix error 113 on your Vive.
(Error 200) Driver failure
This error message indicates that the OpenVR driver failed. If you have added any files or folders to the SteamVR driver directory, removing them will fix the issue. If not, you may not have appropriate permissions to write to your user directory.
Change permissions
Step 1: In Windows Explorer, right-click and select the folder whose permissions you want to edit.
Step 2: click attribute.
Step 3: Click Next. security tag.
Step 4: Check the name listed in . Group or user name box. If you don’t see the account you’re using add Enter the name of the user you want to add. If your username is already displayed, skip this step.
Step 5: To change permissions allow or deny Check the box. Permissions for users or groups box. You’ll want to allow access to fix error 200 on your Vive.
Error 109/400
If you see this code, it is usually because your headset is not properly connected to the GPU. Double-check that your link box and primary display are connected to the same GPU in Settings. If you must use a laptop, make sure your connection is using a separate GPU. Sometimes switching to “Prefer maximum performance” or a similar setting will cause your computer to make the correct transition.
(Error 206) Driver is not calibrated.
Error 206 means SteamVR cannot load headset calibration. To fix the issue, you will need to reset the headset to force the driver reinstallation.
Reinstall headset driver
Step 1: Disconnect the headset.
Step 2: In SteamVR, go to: Settings > ResetClick and Remove all SteamVR devices. please wait for a moment.
Step 3: Reconnect your headset and wait for the drivers to install.
Step 4: If repeated attempts do not resolve the issue, Valve’s support website reports that the device may be defective and encourages users to contact HTC through the company’s website.
(Error 207) Driver calibration is incorrect.
This error is similar to error 206 in that it means SteamVR failed to load headset calibration. So the steps to solve the problem are the same.
Reinstall headset driver
Step 1: Disconnect the headset.
Step 2: In SteamVR, go to: Settings > ResetClick and Remove all SteamVR devices. please wait for a moment.
Step 3: Reconnect your headset and wait for the drivers to install.
If repeated attempts do not resolve the issue, Valve’s support website reports that the device may be defective and encourages users to contact HTC through the company’s website.
(Error 208) HMD display not found / (Error 208) HMD found via USB but no monitor found
If you receive error 208 with the message “HMD display not found” or “HMD found via USB but no monitor found”, try these potential fixes:
- Update your graphics card drivers.
- Recheck the connections of all cables from the headset to the link box, and from the link box to the PC and power outlet. The power cord may become loose, especially after excessive use. This can be checked by sliding the MHD’s removable cable panel forward and off.
- Make sure the orange end cord of the headset is connected to the orange port on the link box.
(Error 215) GPU connection failed
This usually happens when your graphics card has an important update that has not yet been installed. Make sure your GPU is fully updated. If you have multiple GPUs and this issue continues to recur, consider disabling or removing all GPUs except the one you use for Vive. Sometimes DisplayPort adapters can cause this issue and need to be removed to fix the issue.
(Error 301) Connection failed
This indicates that vrserver.exe is not started or connected. Sometimes this is caused by multiple instances of a program running simultaneously.
Terminating the VRServer process
Step 1: Quit SteamVR.
Step 2: category task manager In the Windows search bar Task Manager.
Step 3: Find the next instance: vrserver.exe It may be running and kills the process.
Step 4: run SteamVR.
If this does not resolve the issue, Valve’s support page instructs users to send in a system report as detailed in the introduction to this article.
(Error 302) Initialization failed
This error means there was a problem starting vrserver.exe.
- This problem is usually resolved by rebooting your computer and trying again.
- If this does not resolve the issue, Valve’s support page instructs users to send in a system report as detailed in the introduction to this article.
(1101~1112) USB error
All error messages between 1101 and 1112 are related to USB errors. Reinstalling your headset USB drivers may resolve the issue.
Reinstall headset driver
Step 1: Disconnect the headset/link box, controller, and other VR devices connected to the PC.
Step 2: In SteamVR, go to: Settings > Reset, and click Remove all SteamVR USB devices.
Step 3: click yes.
Step 4: Quit SteamVR.
Step 5: Reconnect the headset, this time using a different USB port, and wait for the drivers to install.
Step 6: Restart SteamVR.
If this does not resolve the issue, Valve’s support page instructs users to send in a system report as detailed in the introduction to this article.
Vive headset issues
Internal tracking keeps getting messed up
The internal tracking used in Cosmos requires no setup, but some players have found that the tracking seems to skip a lot or become inaccurate. The key is probably somewhere in the environment itself. If you’re using Cosmos in a dark room, try turning on the overhead lights brighter. If you have mirrors or reflective surfaces nearby, try removing them and covering your windows to improve your experience. It may also be a good idea to have a few basic objects (outside the tripping range), as a completely blank wall can actually confuse the headset’s data collection.
Can’t play older titles on Cosmos headset
Not all Vive games work on the Cosmos model, and sometimes bugs prevent them from working properly. HTC reports that about 90% of Viveport’s most popular titles are compatible, but results may vary depending on what you want to play. Keep checking for updates to see if bugs have been fixed or more compatibility added.
The Vive Pro 2 has some flickering or artifacts, especially around the edges.
Are you using a wired connection? Go wireless. If the problem improves, your headset may have a faulty cable or a software bug. This is a fairly common issue that is still being investigated. Contact HTC to report the issue, keep SteamVR up to date, and play in wireless mode for now.
My controller battery keeps dying.
The Cosmos controller lasts between 4 and 8 hours. that many This can vary depending on how often the controller sensor needs to be recalibrated, lighting, and the content being played. The best idea right now is to keep a few AA batteries on hand in case the controller starts to discharge unexpectedly. HTC would like to offer a built-in rechargeable battery at some point in the future, but that hasn’t happened yet.
Audio keeps cutting out or cutting out.
The Cosmos model uses built-in headphones that support USB 3.0 connectivity. If you’re having trouble with your headphones, there may be a problem with their connection. Make sure you are using the latest USB 3.0 port and that the connection is secure. Check the cable for damage to make sure there is no problem. Motion-oriented VR experiences may be more difficult to use USB cables than other uses.
Controller and base station issues
Controller not connected
If SteamVR doesn’t recognize your controller, the LED colors will help you know what to do.
If it’s blue
If the controller LED is solid blue, it means that the controller has not successfully connected to the PC. You will need to pair your controller again. To do so, go to: SteamVR > Settings > Devices > Pair Controller.
If it’s red
If the controller’s LED is solid red and the controller is unresponsive, try resetting the controller.
Step 1: Press and hold the trigger, menu button, trackpad button, and grip button simultaneously.
Step 2: While holding down this button, connect the controller to your PC via micro USB.
Step 3: After plugging in, wait about 5 seconds and release the button. Your PC will appear looking for a new storage device. Ignore this message and unplug the controller.
Step 4: After that, your controller will be reset and should now work properly.
If the light does not turn on at all
If the LED shows no color, the controller is not turned on. To turn on the controller, press the system button. If your controller doesn’t turn on, you need to charge it. Connect the controller to an outlet via micro USB and power adapter. While the controller is connected and charging, the LED will display different colors.
- Orange — The controller is charging.
- Green — Fully charged and controller is turned on.
- White — Fully charged and controller is turned off.
Controller trackpad is unstable or overly sensitive.
If your controller is a bit finicky or difficult to use, you may need to calibrate it or update its firmware.
Step 1: In SteamVR, go to: SteamVR > Device > Firmware Update.
Step 2: Turn off the controller by pressing and holding the system button until the LED turns off.
Step 3: With the controller turned off, press and hold the trigger and grip buttons.
Step 4: While continuing to hold down the trigger and grip buttons, press the system button. The controller should turn back on. If this happens, a noise different from the normal power-on noise will be generated.
One or both base station LEDs do not change from blue.
This usually means that the Vive base station is having a hard time stabilizing. Vibration or movement can cause this error.
- Make sure the base is securely mounted. If mounted on the wall, tighten all screws and retaining nuts. If you use a tripod, make sure that movement of the floor doesn’t transmit vibrations through the frame.
The base station does not exit standby mode (LED dims green).
If your Vive Lighthouse base station won’t wake from standby mode, try the following:
- Disconnect and reconnect the base station.
The base station LED glows steadily or blinks purple.
This means that the base stations are having trouble seeing each other.
- Try moving anything that might be blocking the Vive Base Station. Including yourself. Follow the Steam VR on-screen instructions if necessary.
- Make sure the base stations are tilted at an angle that allows them to see each other and the play area.
Base station LED is off.
If the Vive Base Station’s LED does not light, it means that the base station is not receiving power.
- Make sure the power cord is connected.
- If the base station is plugged into an outlet but does not power on, try using a different outlet.
Base station optical synchronization issues
The base station may experience problems while attempting to sync. Here are some tips to ensure you are properly set up for optical synchronization:
- Double-check that your base station firmware is up to date. movement SteamVR > Devices > Firmware Update.
- Make sure the path between base stations is unblocked so they can see each other.
- Avoid placing stations too far away. Must be within 16 feet of each other.
- Make sure your base station is set to the appropriate mode. Set one station to “b” and the other to “c” by pressing the mode buttons on the back of the stations.
- Consider placing the base station higher so that movement in the venue space does not obstruct the view.
If all of the above criteria are met, the base station LED will turn green when synchronized. If that doesn’t work, try using a sync cable.
Step 1: The Vive box comes with a long optional cable. Connect this cable to the base station.
Step 2: Press the mode button on the back of the station until one station displays “a” and the other station displays “b.”
Step 3: If done correctly, the base station LED should now be solid green.
Software and headphone issues
The device icon blinks green in Steam VR.
This means that one or more devices are not being tracked properly or are not being tracked at all. Solving a problem should be easy.
- Every device must be facing at least one base station. If not, adjust your settings to show all devices.
- Make sure your base station is fully powered and synced. If everything is turned on and operating properly, the base station LED will be green.
- Make sure your controller is turned on and charged. The LED should be green.
- Make sure your headset is connected properly. The LED should be green.
- Make sure all firmware is up to date. If not, consider upgrading. To do so, follow the on-screen instructions.
SteamVR files are corrupted or missing.
Incomplete installation may cause files to become corrupted or missing. You need to make sure your installation is completely intact.
Step 1: Quit SteamVR.
Step 2: Go to the Steam desktop client.
Step 3: Go to next Library > Toolsand right-click SteamVR. choose attribute.
Step 4: opening local file tag.
Step 5: choose Check the integrity of the tool cache.
No sound when using the Vive headphone port
If you can’t hear sound through your headphones, headset, or speakers, you’re not alone. There are many methods you can try to get your Vive audio working.
- Make sure SteamVR is still open and running.
- Make sure your headphones are connected properly. If you are using the Deluxe Audio Headstrap, make sure your headphones are connected to the headphone extension cable and that the cable is connected to the headset itself.
- The headset may be on standby. Move around and see if it wakes you up.
- Right-click in Steam VR and select Settings > Audio. at Mirror audio to your device Select the desired device from the drop-down menu.
- Make sure your Vive is receiving audio from Steam VR. Right-click on Steam VR and Settings > Audio. at Playback device settings Select from drop-down box HTC-VIVE.
- If you’re using speakers, right-click SteamVR and Settings > Audio. at Playback device settings Select from drop-down box speaker or USB audio device.
- Windows may not be able to send audio to your Vive headset. Right-click the volume icon in the Windows taskbar, and then playback device. choose HTC-VIVE-0 And try setting it as your default device. If your Vive doesn’t appear in this list, try choosing: Show disabled devices and Show disconnected devices.
- In the Windows Volume Mixer, make sure your Vive’s volume slider is turned on. Right-click the volume icon in the Windows task tray and open volume mixer. Find the slider. HTC-VIVE-0 Set the volume to around 50%.
- Check your app or game volume. Right-click the Volume icon in the Windows task tray and open the Volume Mixer. Find any games or programs running and make sure the volume is set to 50% or higher.
There is no sound when using USB headphones with the Vive’s additional USB port.
If you can’t hear sound through your headphones and they’re connected to an additional USB port, here’s what to do:
- Make sure your Vive is receiving audio from Steam VR. Right-click in Steam VR and select Settings > Audio. In the Playback device settings drop-down box HTC-VIVE.
- Windows may not be able to send audio to your Vive headset. Right-click the volume icon in the Windows task tray and playback device. choose HTC-VIVE-0 And try setting it as your default device. If your Vive doesn’t appear in this list, try choosing: Show disabled devices and Show disconnected devices.
When connected to the Vive headphone jack, sound stops playing.
Some people have experienced issues with sound cutting out when connected to the Vive headphone jack. Here are a few things to check to get it back:
- Make sure SteamVR is still open and running.
- The headset may be in standby mode. Move around and see if it wakes you up.
- To maintain audio playback while your headset is in sleep mode, right-click the volume icon in the Windows task tray, then playback device. choose 2-USB audio deviceClick and set it as your default device. If your Vive doesn’t appear in this list, try choosing: Show disabled devices and Show disconnected devices.
- If the above doesn’t work, try using a USB headset with the Vive’s additional USB port.
Static electricity when using earbuds
If your Vive receives an unexpected shock while using the earbuds, there may be noise. This usually doesn’t mean a problem. If you experience static electricity or a mild electrostatic shock, it doesn’t necessarily mean that your Vive is malfunctioning and is nothing to worry about. However, it can be annoying.
- Valve notes on their support page that this usually happens in much the same way as a static shock, like a sock on a carpet or a balloon rubbing against your head.
- Use anti-static sprays and lotions, and wear clothing made from natural fibers to reduce static build-up.
- Dry environments are particularly susceptible to this, but using a humidifier is enough to add moisture to the air and prevent static build-up.
After upgrading, your Vive will appear as your computer’s primary monitor.
Many people have discovered that after upgrading to Windows 10, their Vive shows up as the primary monitor on their computer. This is not an ideal situation. Fortunately, it’s very easy to fix. Simply disconnect the headset for your link box and reboot your computer. Once the computer has finished rebooting, reconnect the headset cable to the link box. Everything will be okay now!
The Vive keeps skipping frames no matter what I try.
If this happens with everything you try, it may be due to the way your computer controls the display. There are many settings that can cause this, but one of the most common is Night Mode. Check your computer and make sure the night mode setting is not enabled. Also make sure you are not running any other types of software that intentionally change the appearance of your computer display.
Variable brightness or continuously darkening images
Newer headsets, such as the Vive Pro 2, may have some issues with automatic brightness adjustment. Users may find that the screen’s brightness levels shift distractingly, or that it instantly dims when looking in a certain direction, making visibility an issue.
If you think this is an issue, visit SteamVR Settings. SteamVR recently added a universal brightness slider that allows you to manually control brightness. You can also check to see if there is an in-game option to adjust the brightness.
Vive wireless adapter issues
The HTC Vive wireless adapter is one of the best upgrades that can improve your VR experience for room-scale play, but the experience is not error-free.
No power to headset
If your headset isn’t working or won’t power on at all with Vive wireless installed, try these fixes:
- Make sure the battery is connected to the Vive wireless adapter via a USB cable.
- Make sure your Vive Wireless Adapter is connected to your Vive headset using all three cables.
- Make sure the battery is charged. Click that button to check.
- Turn on both devices by pressing the button on the battery and then pressing the button on the Vive wireless adapter.
If you’ve done all of the above, try running the Vive wireless connection software again and then launching SteamVR.
Initialization aborted
If your Vive Wireless Connect application is stuck at “Initializing” or some other intermediate stage, there are a few things you can try to resolve the issue.
- Make sure you do not overextend the wireless transmitter/receiver. The coaxial cable for the wireless transmitter/receiver can be extended another 2M, but problems may arise beyond that. It is also worth checking that you are using high quality coaxial cable.
- Make sure your Vive wireless adapter is within visual range of the wireless transmitter/receiver. 30 feet is the maximum distance they should be apart from each other.
- Try changing the PCI-Express card to a different PCIe slot.
If nothing else works, try this:
Step 1: search device manager Select the result in the Windows Search box.
Step 2: Find Intel Wireless Gigabit VR Adapter Click the arrow next to it. Right-click. Intel Wireless Gigabit W11100 VR Device and choose cause disability
Step 3: Now, right-click on the Intel Wireless Gigabit W11100 VR Device and select the “Activate” option.
Then try running the Vive Wireless application again. If everything goes according to plan, you will now find your headset.
Gray screen while playing
- Make sure your Vive wireless adapter isn’t too hot. If the adapter exceeds the maximum temperature limit, it powers off and stops VR functionality until it cools down enough to restart. Maintain cool temperatures by adjusting the thermostat to a lower temperature, connecting a portable fan directly to the adapter, or strategically planning outages.
- Fully charge the battery. If your battery charge runs out quickly, your gaming experience will become slow and erratic.
- Make sure there is a clear and visible path between the headset, receiver and transmitter.
Despite the difficulties of connecting a VR headset to a device, VR headsets are in high demand and are gaining popularity by the minute. We are confident that this article provides thorough guidance for assessing and resolving any issues that may arise with your HTC Vive in the future.